A recurve bow’s nocking point keeps an arrow in place on the bow string, making sure it is propelled from a consistent position and with consistent force.
Nocking points can be make of plastic or metal, but many archers simply tie knots of thread onto their strings to make their own. Some of the advantages of this approach include the nocking points being simple to install, change, sturdy and easy to maintain.
Here’s how to tie your very own nocking point…
Gear
To tie a nocking point, you will need:
- Bracing height gauge
- Thread
- Lighter
- Scissors
- Hot-melt glue (optional)
Step 1

Run the thread you’ll use for the nocking point through the stick of hot-melt glue. This step is entirely optional, but it will help to bind the thread to the string later on in this process.
Step 2

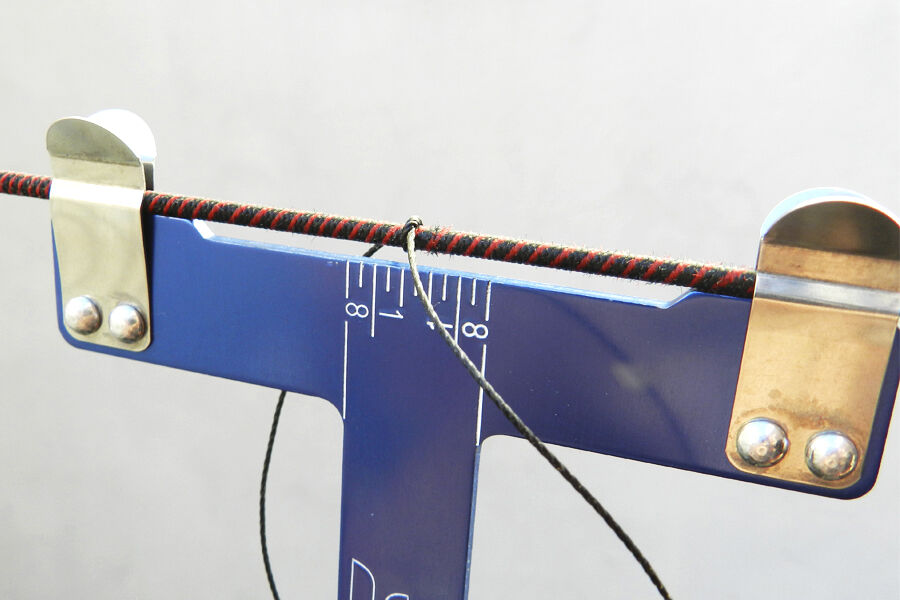
Clip your bracing height gauge, also known as a T-square, onto your string, resting it gently on your arrow rest.
Step 3
Choose a mark above the bottom line of the gauge for the top nocking point. This will define where your arrow sits on the string and it will take time – and tuning – to find the perfect place.
A good place to start is 3/16ths of an inch, or about 5mm, up.
Step 4
Loop the thread around the string and tie a knot, securing it in the place you have chosen.
Step 5

Tie a second knot below the first, with the bulk of the knot on the opposite side of the string, then a third, above the original knot and facing in the same direction.
Step 6

Alternate tying knots above and below on the string, or on top of previous knots, until it is the desired size and shape.
Step 7
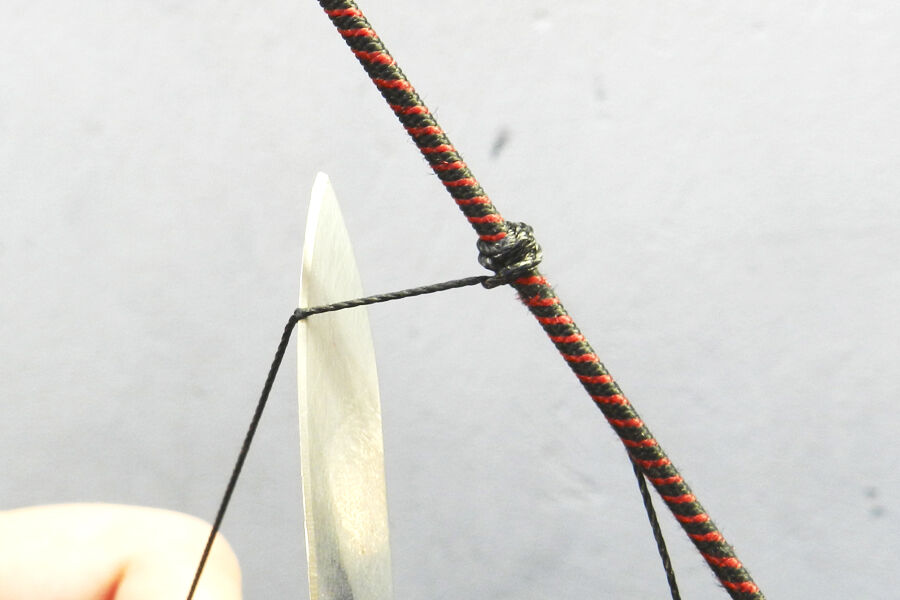
Cut the loose ends of the thread to around 5mm in length.
Step 8

With a lighter, carefully heat the ends of the thread. (Be super careful not to burn your string!)
The material will catch alight and melt down slowly. Once the excess thread has burned away, press the molten ends down onto the nocking point to seal it.
If you completed step one, the hot-melt – heated by the lighter – will have helped to bond the nocking point together firmly.
Step 9

Nock an arrow to the string and repeat the whole process again for the bottom nocking point.
Be careful to leave enough space for the arrow to move a little bit, otherwise when you draw back the two points may pinch the arrow on the string.

With two nocking points tied, you’ll be ready to shoot straight away!